
Neck Straighting and Fret Leveling – According to the advice from You Tube and others, the most important thing about a guitar is the neck. The neck has to be straight and the frets have to be level. Well, Day 2 began by using the crappy Fret Guide that I purchased from Amazon.ca. Again, lesson learned, you get what you pay for. That didn’t work so I used a carpenter’s square to see if the neck was straight. Turns out, it wasn’t. With a few adjustments to the truss rod, I successfully straightened the neck. For those of you unfamiliar with the parts of an electric guitar, the truss rod is an adjustable steel rod inserted in the neck durning manufacture to straighten the neck.
Now onto the fret leveling. First things first, need to tape the fret board so I don’t mess up and scratch it while leveling. I used a fret rocker to measure each block of 3 frets to see if any are high or low. If the frets are not level, there could be some fret buzz while playing. At least that is what I am told. (BTW – I am throwing out buzz words as if I know what I am actually talking about). 3 of the frets were not level with the others. That means that I have to level them. Before taking a file to the frets (I don’t have any fancy luthier tools that would make this job easier) I took a red sharpie and marked all of the frets. Now when I file them, the red sharpie is removed and I know where I still need to file. The filing went very well, I got all of the sharpie marks off of the frets. The secret was to go slow and careful. I think that I now have the frets level.
Beveling the frets. Now that the frets are level, time to make sure there are no sharp edges on the frets. As I am very luthier tool lacking, rather than a diamond file or specialized tool, I took a fingernail emery board and removed any sharp edges and beveled the frets. This means I made them round again. Then I polished the frets with some silver cleaner which is all I had available at the time. Now they look marvelous. Nice and shiny.
Sacrifice to the Guitar Gods. After I taped up the fret board and put the red sharpie on the frets, I went back to You Tube and the web to make sure I was doing everything correctly. Unfortunately, I found a sight that said “If you have a maple fret board, DO NOT mark the frets with a sharpie, as it may bleed through the masking tape and stain the maple”. Man, I wish I had found this site about 20 minutes earlier. If nothing else, I would have used a different colour. As you will see in the pics, there was some bleed through. I will now officially change my story. In order to appease the Guitar Gods, I had to make a blood sacrifice and the red marks are what I could not get clean.
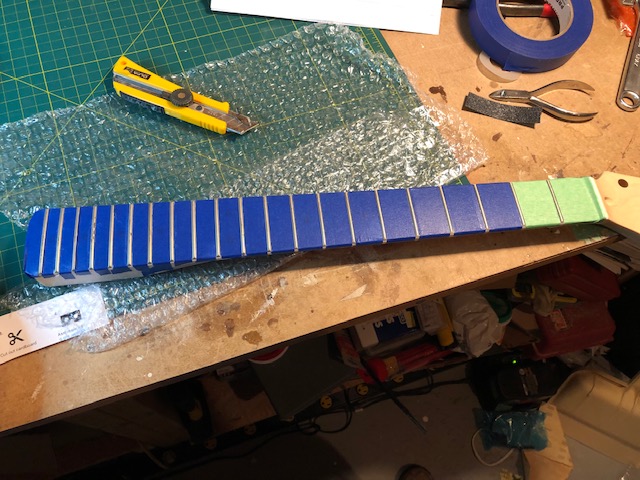
Nice Tape Job 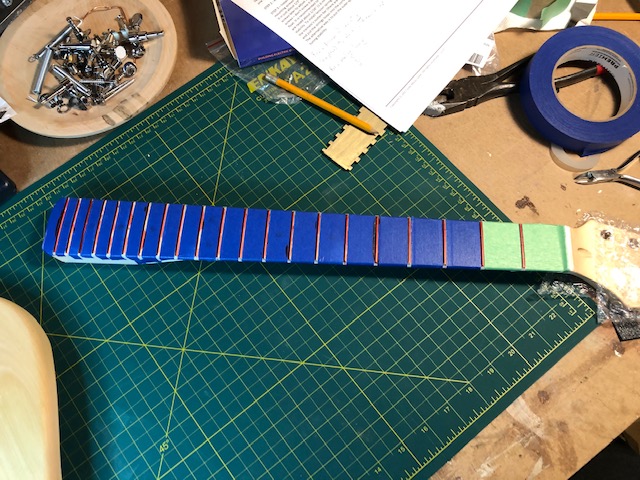
Red Sharpie on the frets 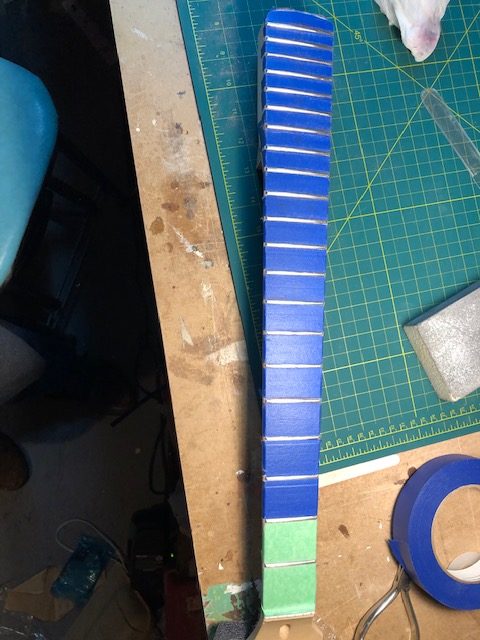
Nice and Shiny Frets 
Unmasked 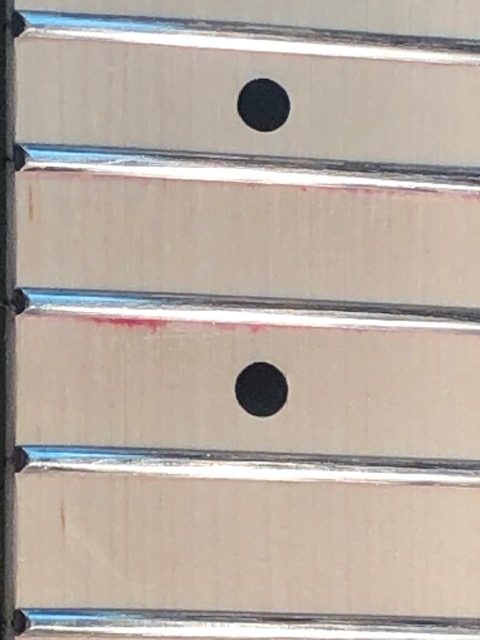
Blood Sacrifice to the Guitar Gods


